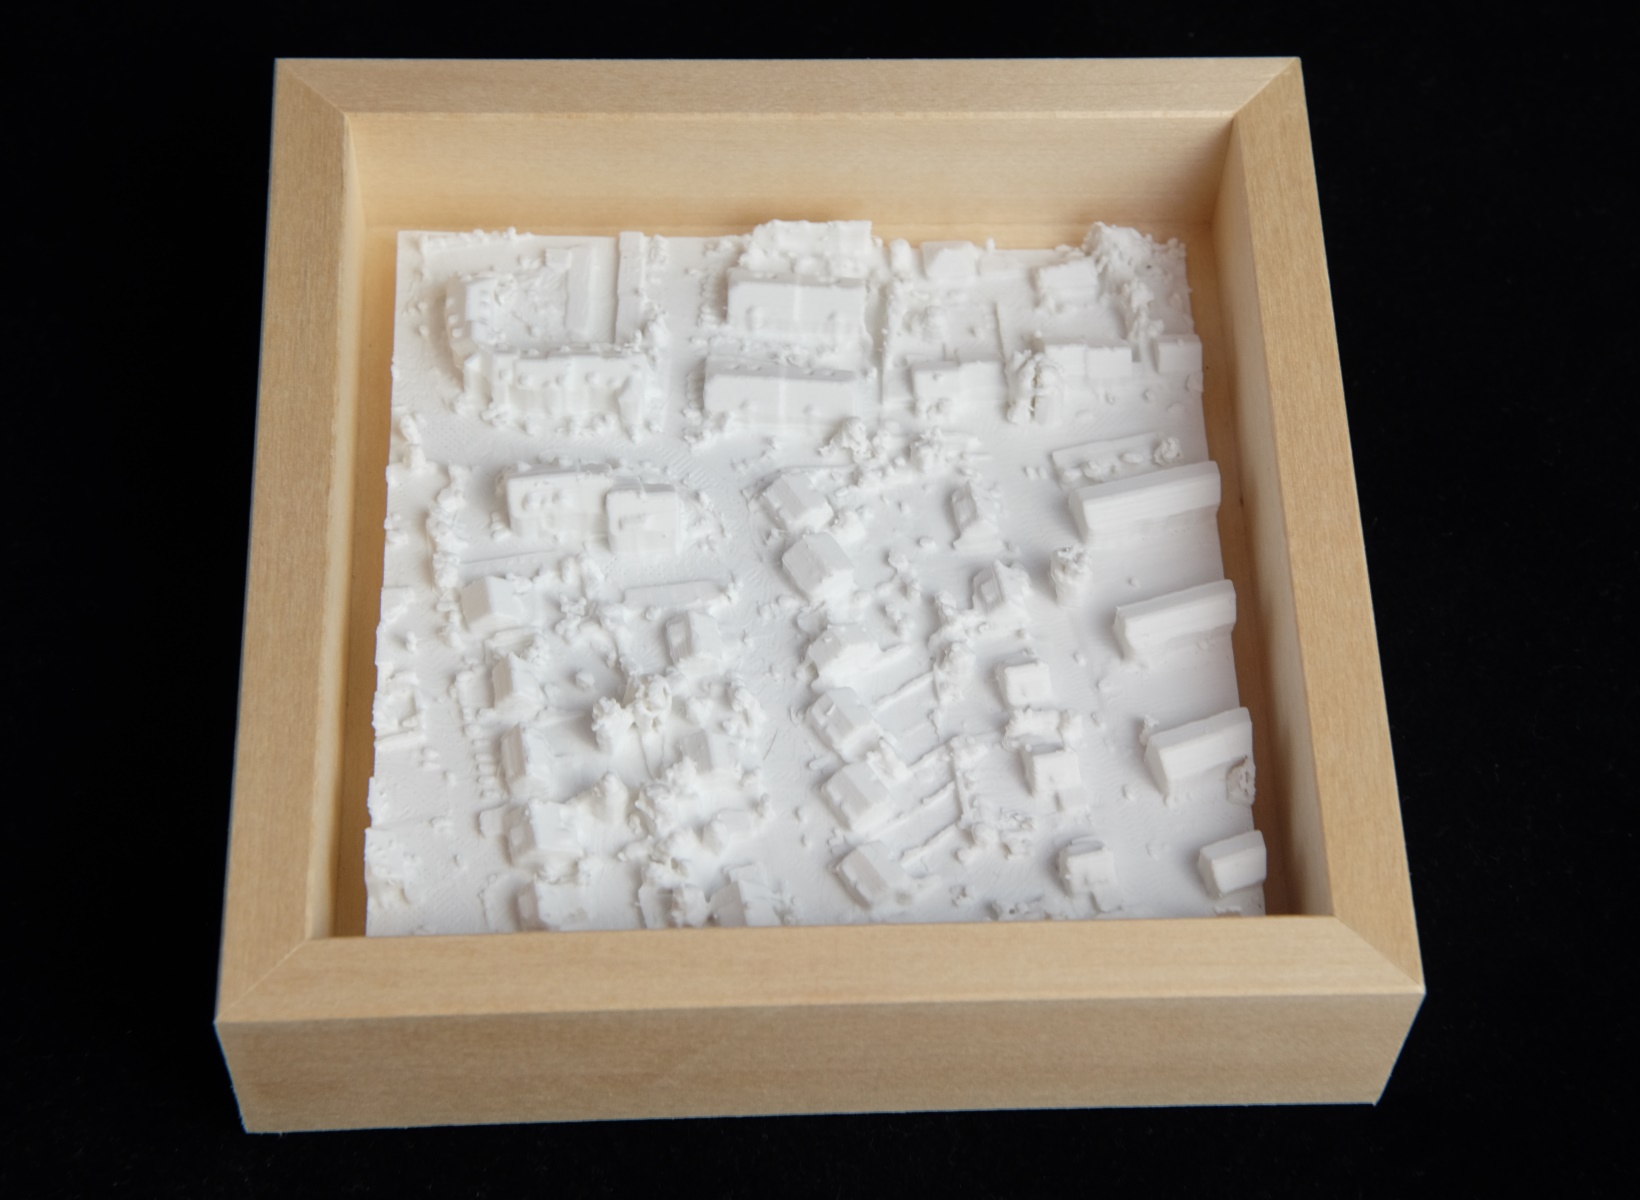
3D printed model of my neighborhood
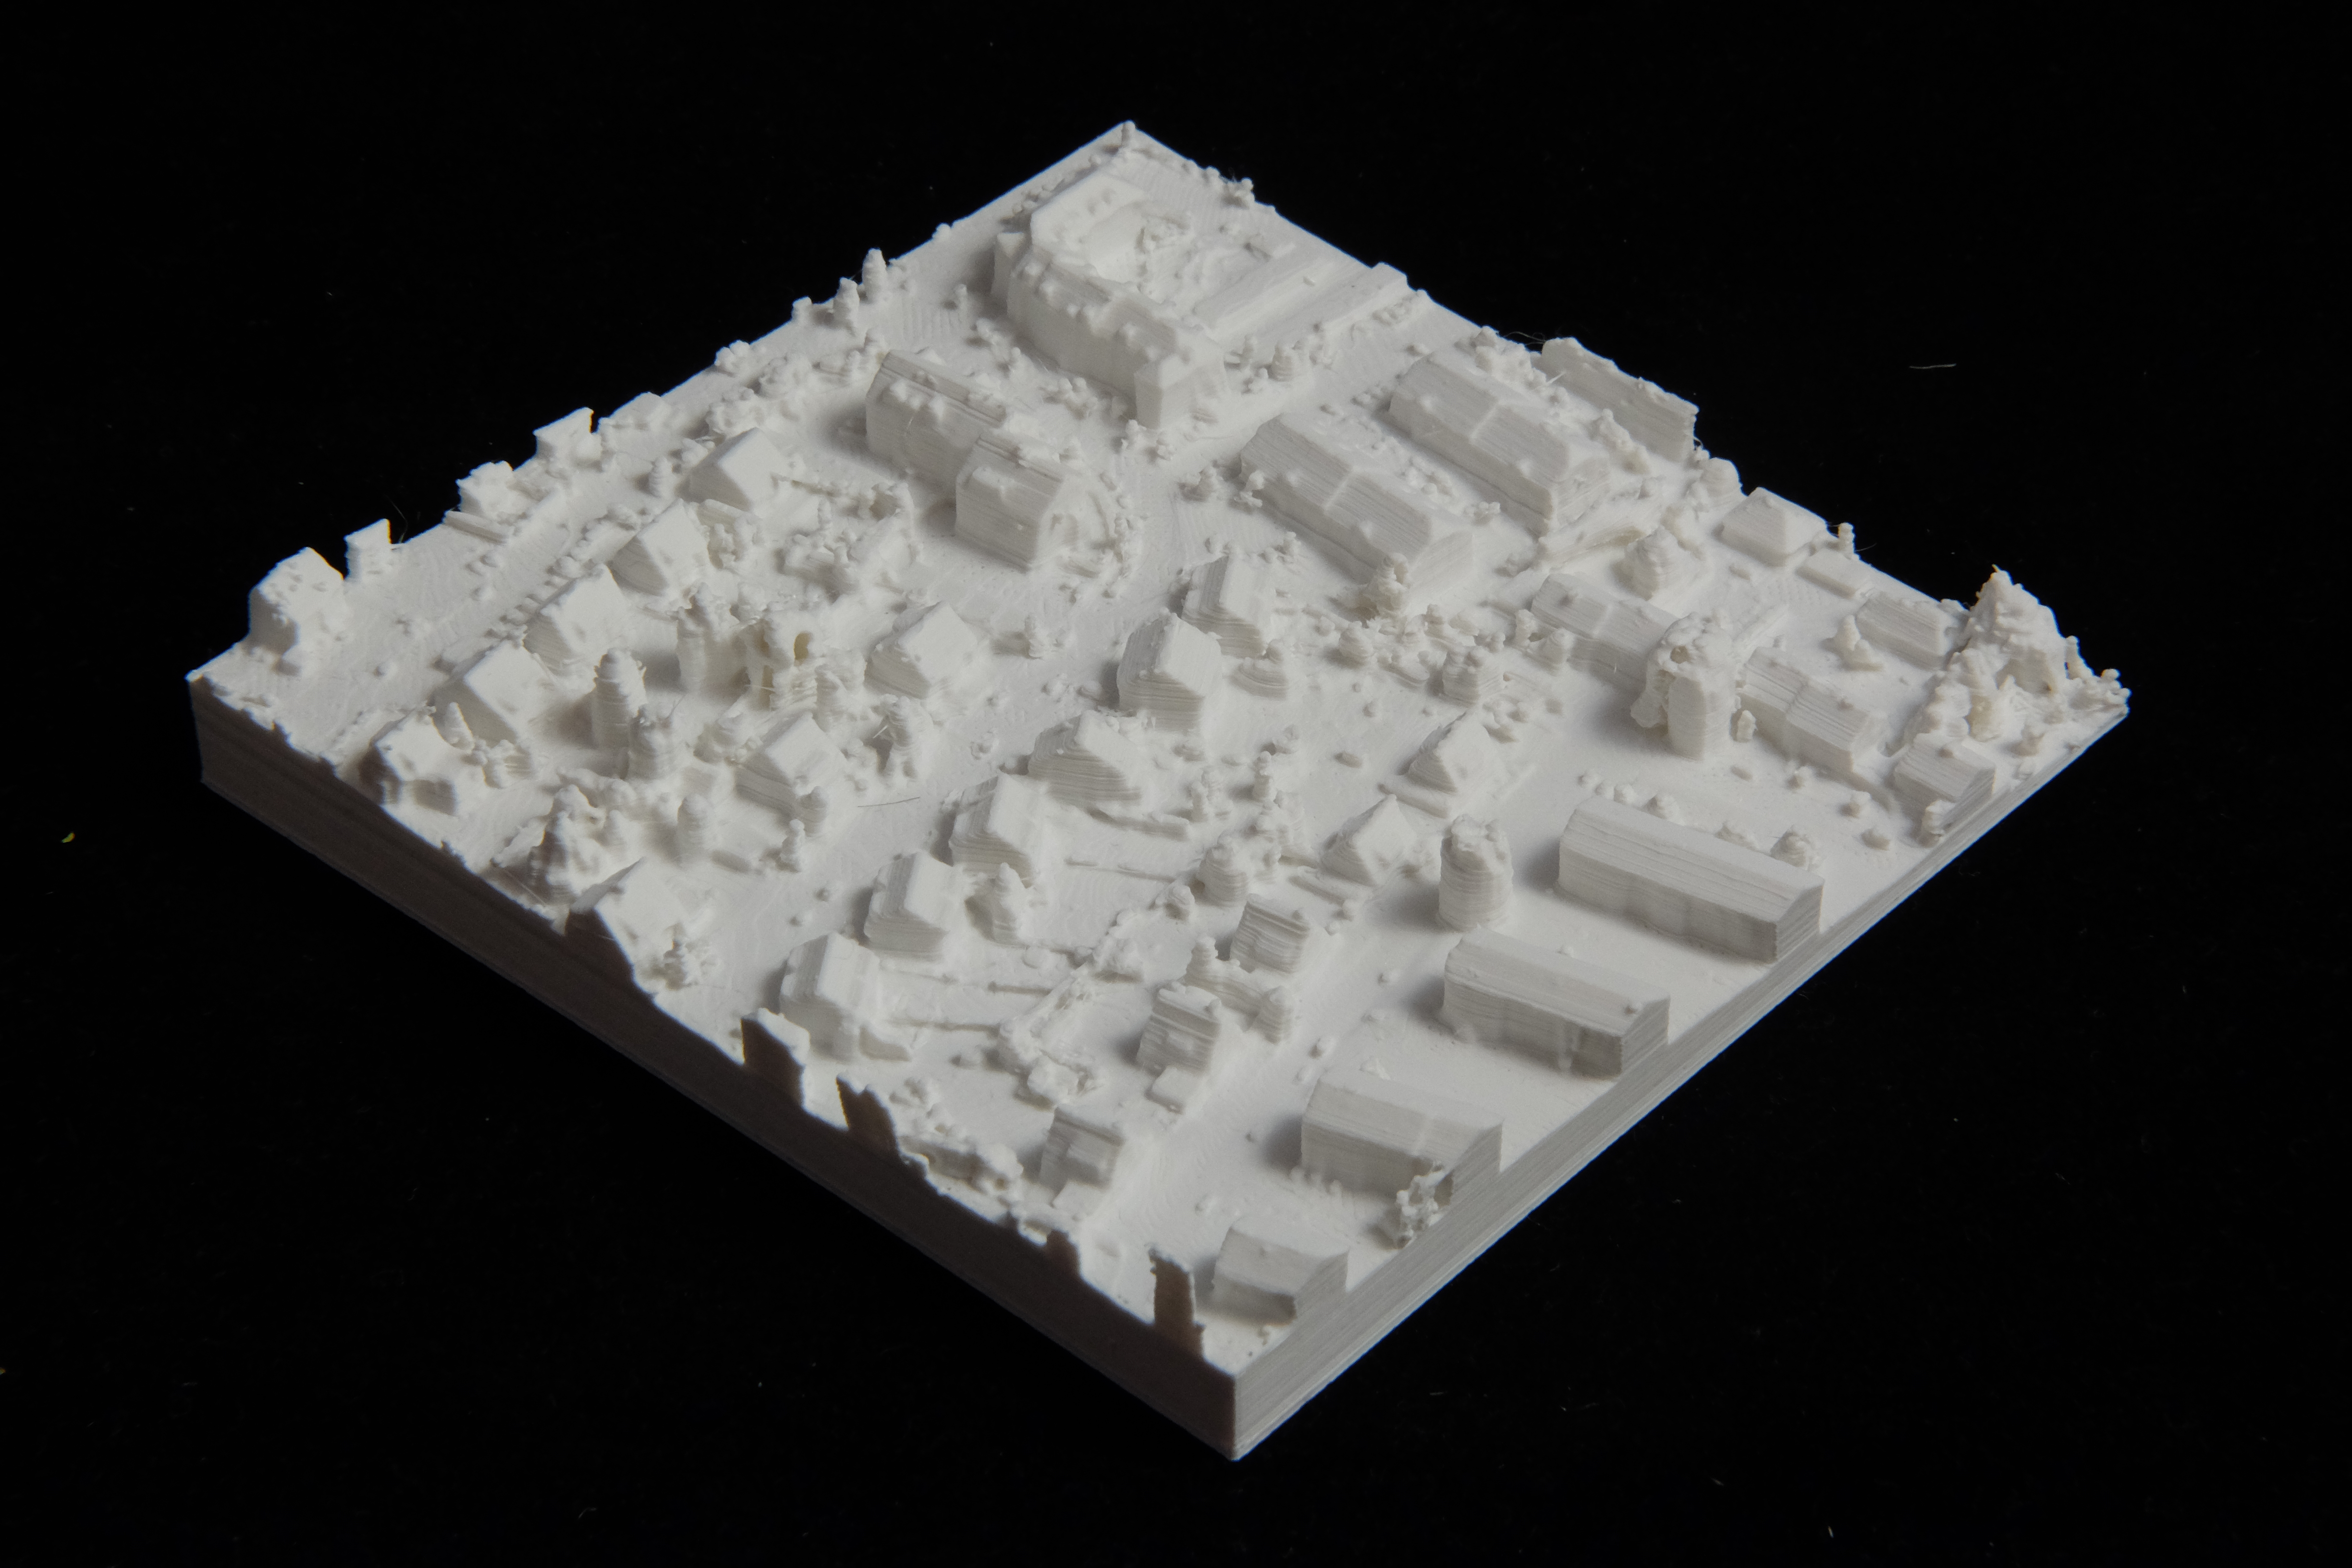
I 3D printed a model of the street where I live. This post will explain how I prepared the data for it.
Update: I have now automated the entire process and published my code. You can find it here.
I worked with aerial Lidar data that is provided by the state I live in to download for free. After completing the rather big download, I figured out what my coordinates are in the projection used with the data and which XYZ file they fall into. I wrote a simple program to extract all the points within a 200m square around my house.
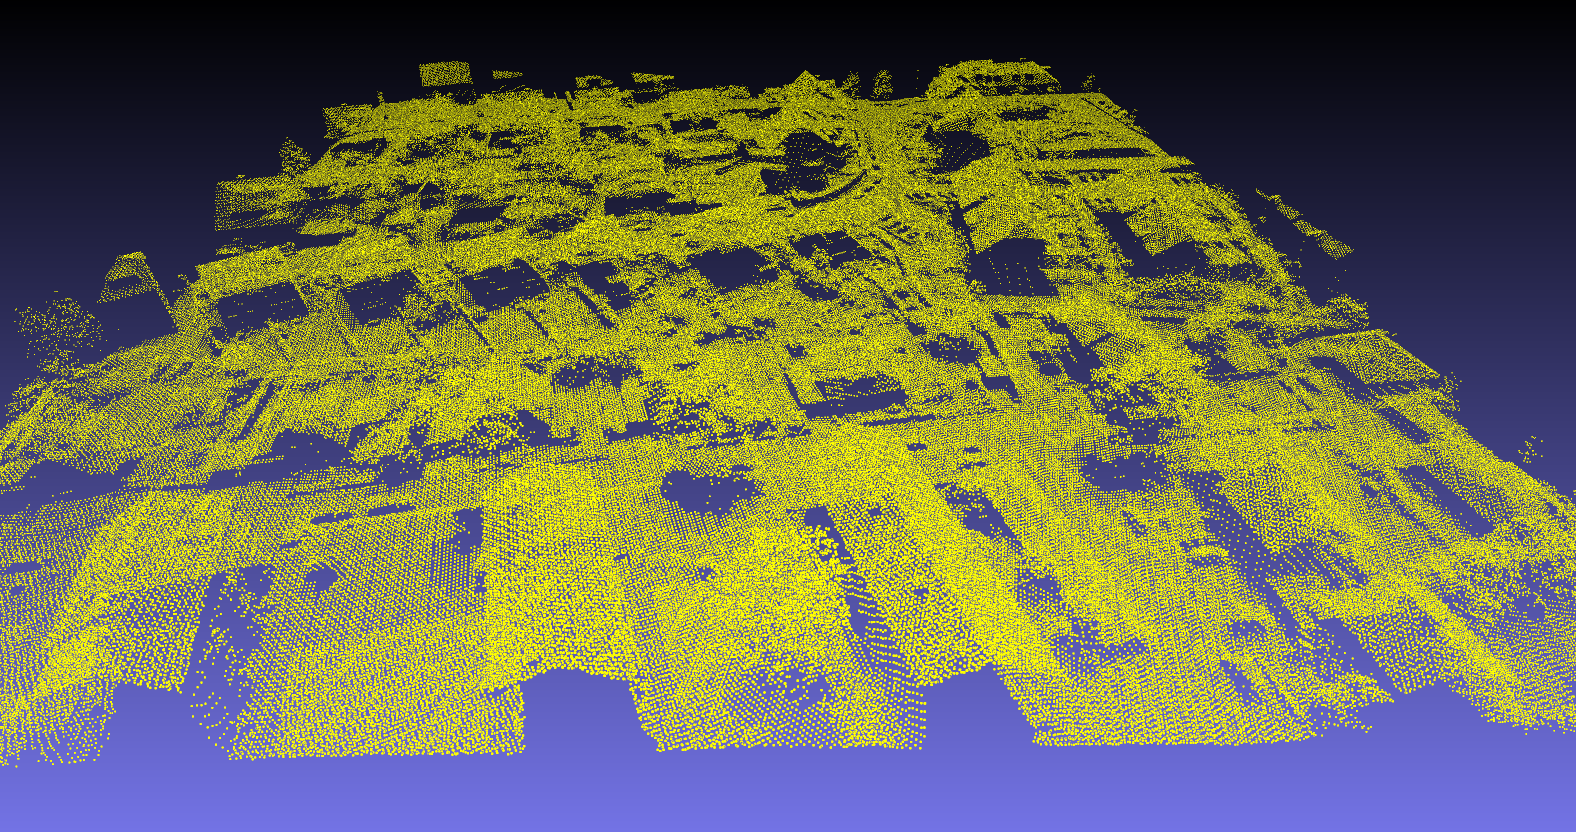
This left me with a smaller XYZ file, now containing 430k points, which are pictured above. The task now was now to turn all these points into a solid body in order to be printable.
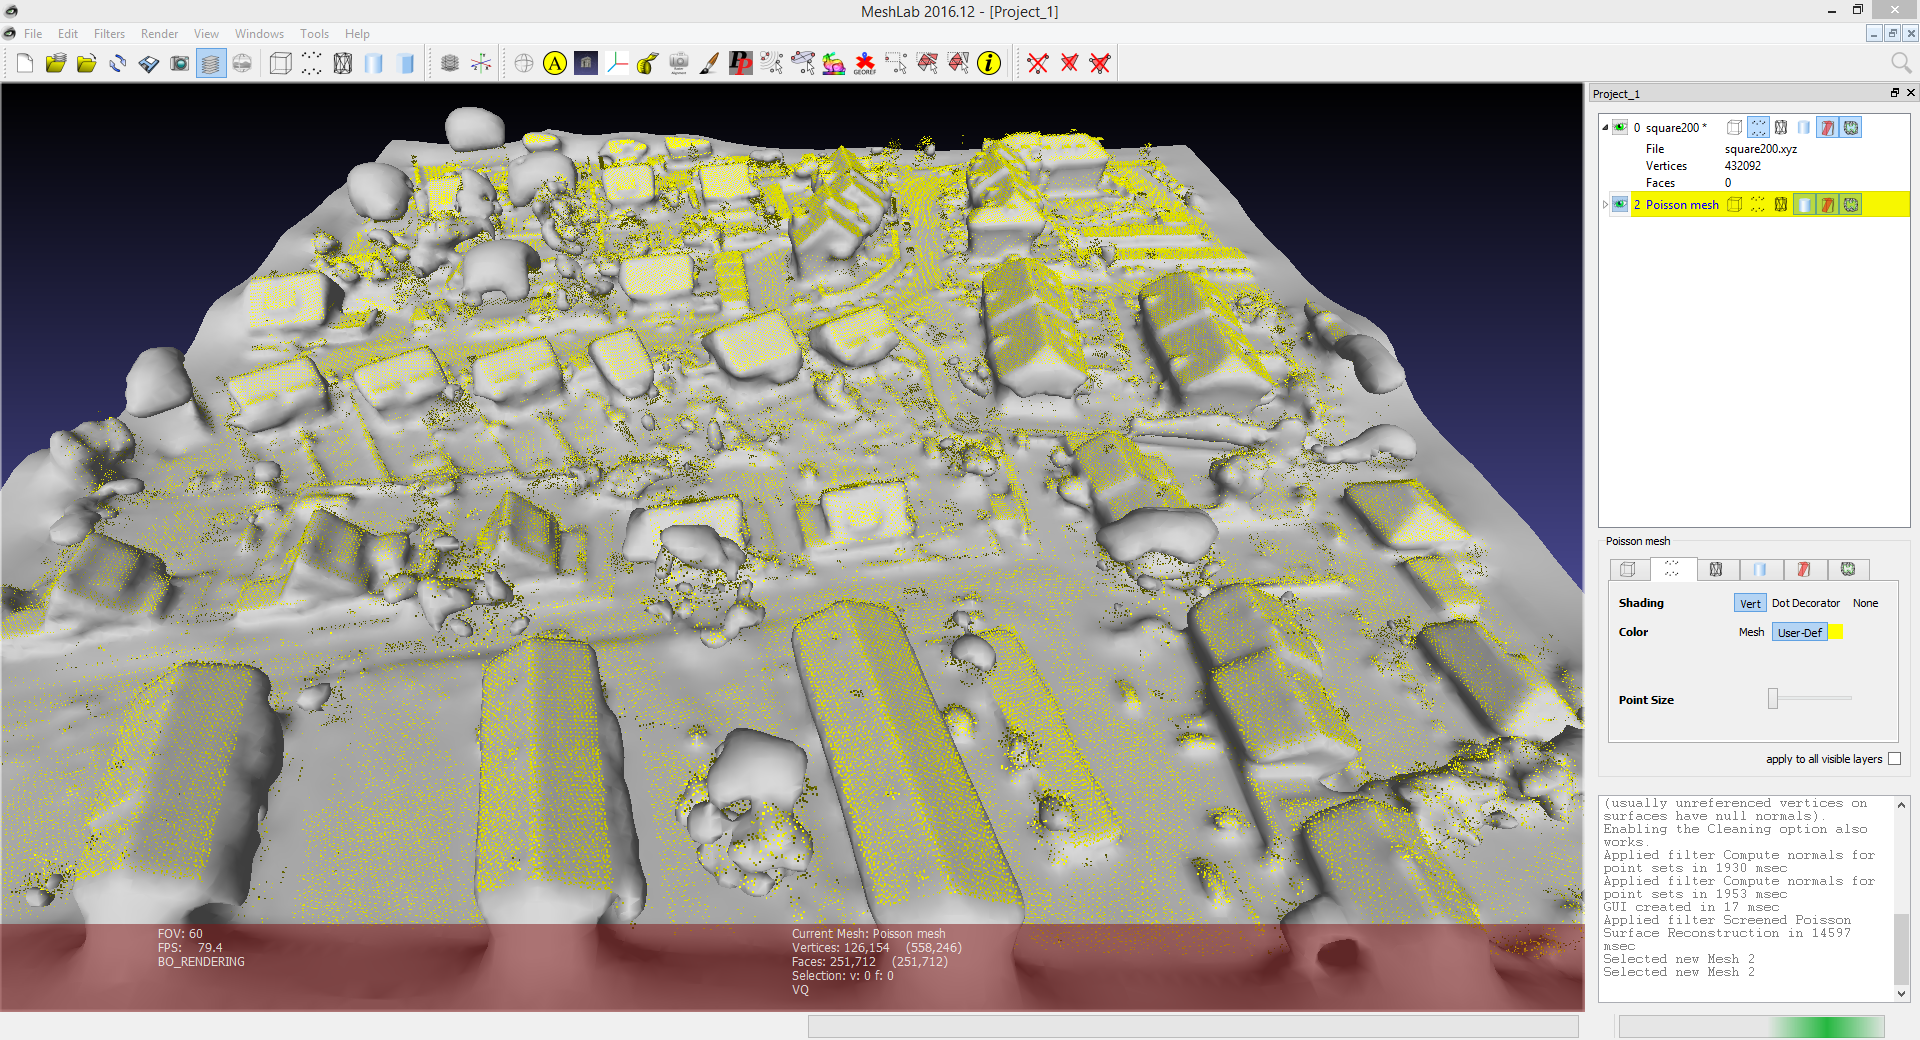
In order to turn the pointcloud into a mesh, I used the software MeshLab. As a first step, I used the program to estimate normals for the pointcloud. The normals are estimated by fitting a plane into some nearby points and using the normal of that plane. However, knowing the plane, there are still two possible normals of which one has to be selected. For some separated parts of the pointcloud, the normals can be flipped and need to be manually fixed.
Here is a mesh that MeshLab generates without normals fixed and wihtout holes patched:
Since the Lidar data are taken from an airplane, parts of the surface that are occluded from the perspective of the plane result in holes in the pointcloud. After trying to generate a mesh with no success, I had to fix the holes first.
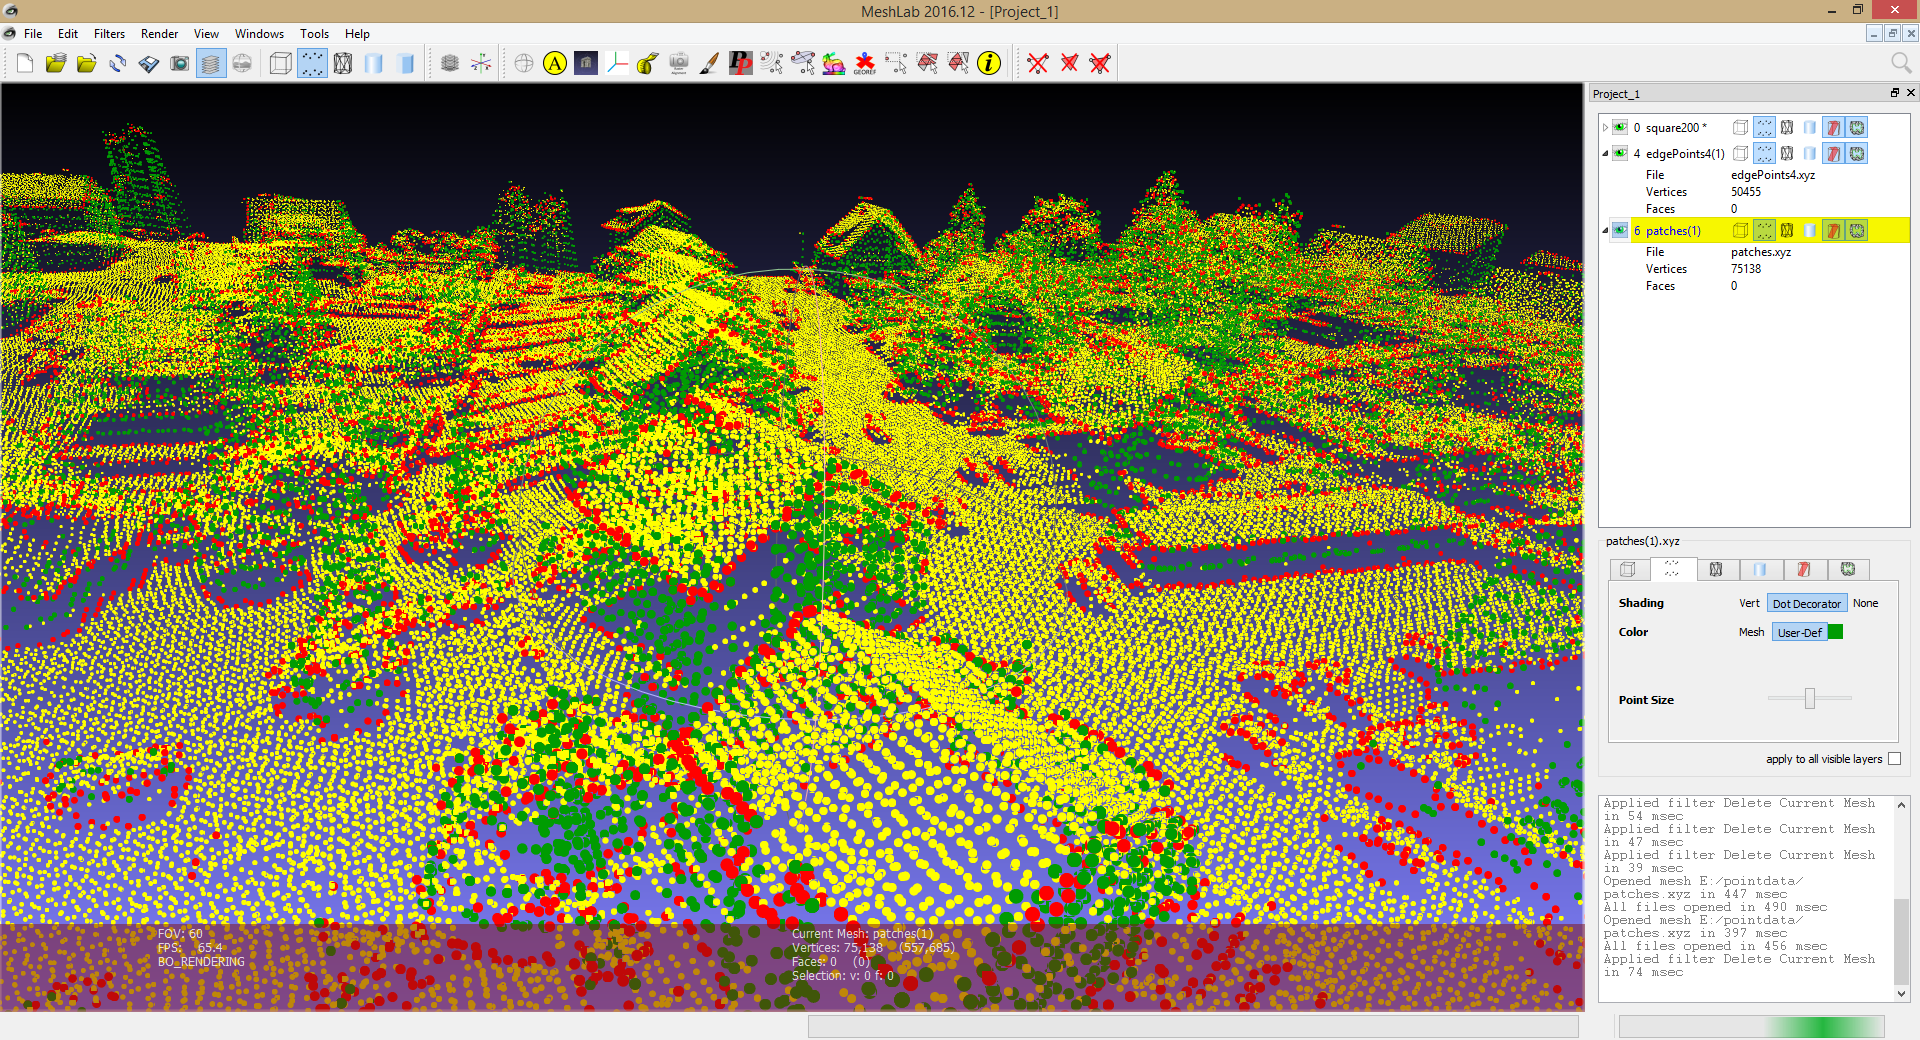
I made a program to detect and fill the holes. First it tries to identify points on the edge of holes. This is done by measuring the distance of a point to the average of some nearby points. This distance is small when the nearby points are found in all directions. Points on an edge have less neighbours towards the hole, resulting in an average shifted away from the edge. Points found like this are shown in red in the above screenshot.
Next, to create patches, the program looks for edge points with other edge points straight above them. Depending on the distance, new points are then created on the connecting line. These are shown in green.
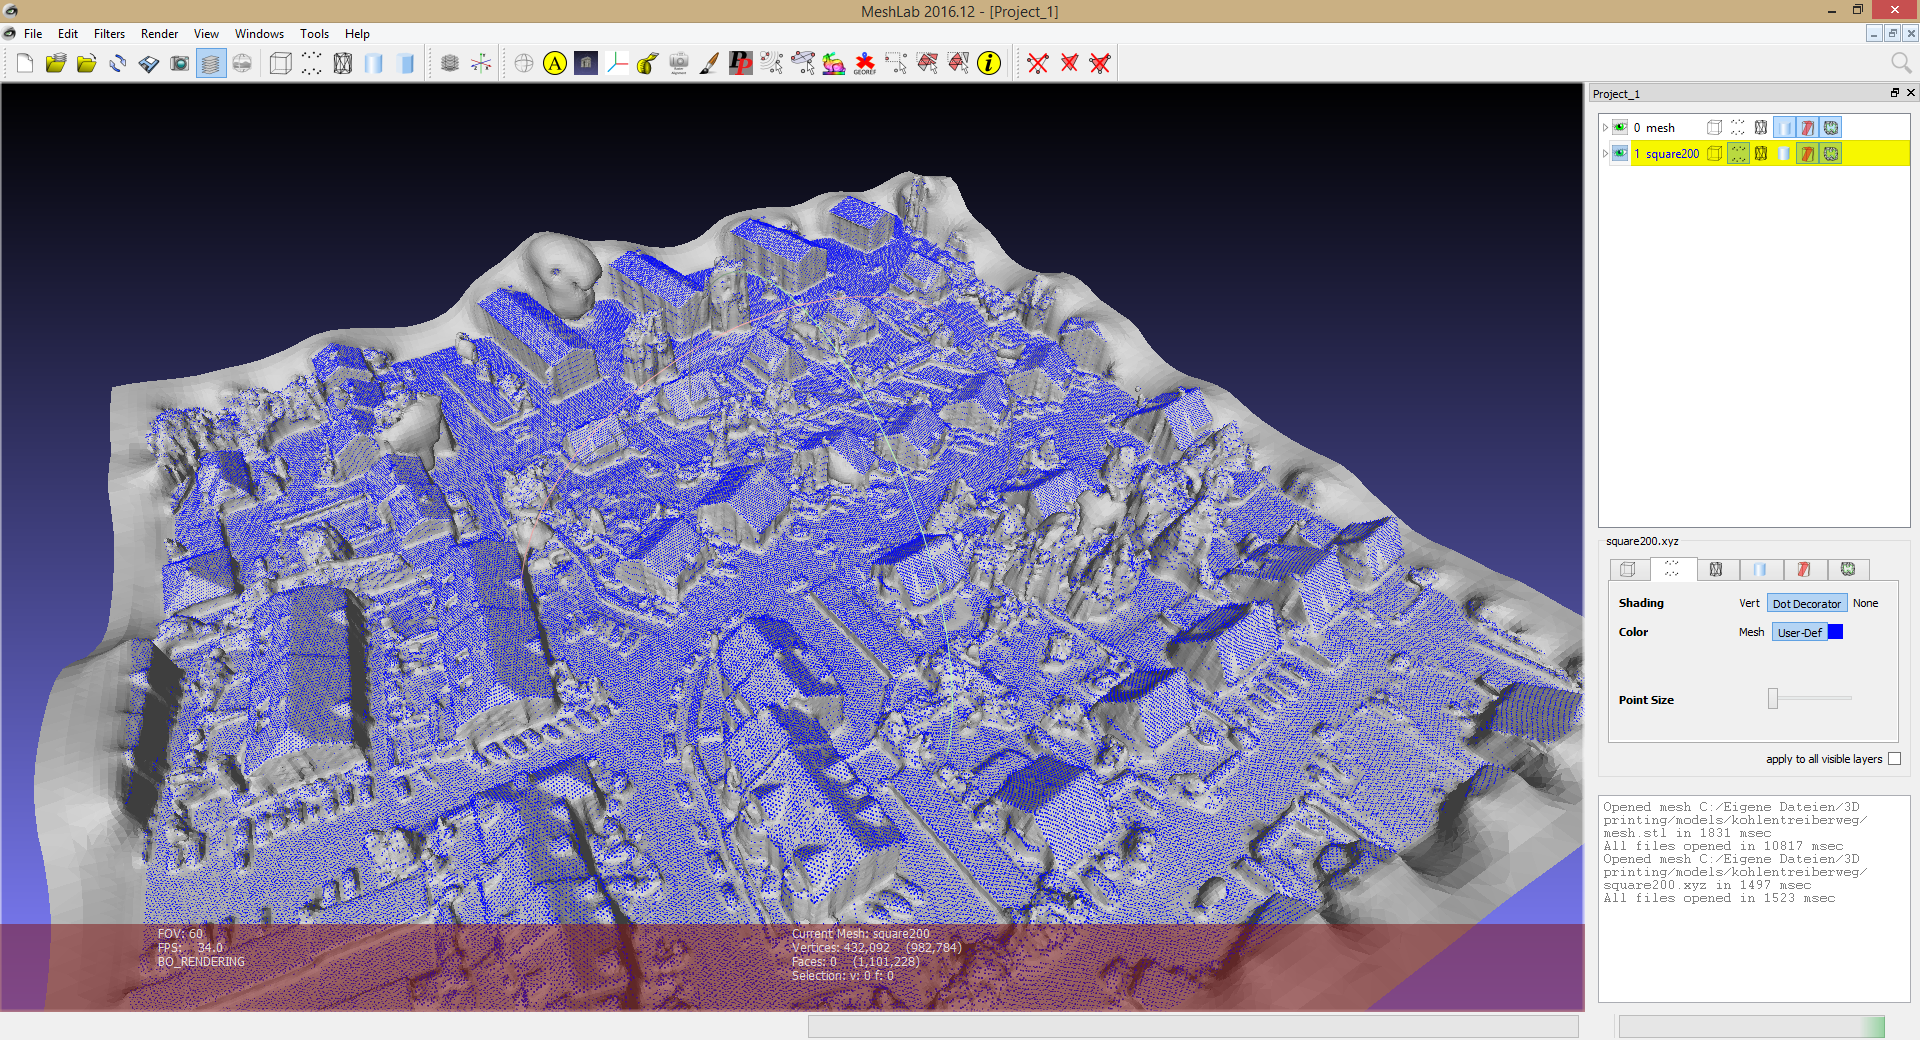
Now I can apply what MeshLab calls “Screened Poisson Surface Reconstruction”. With the holes patched, normals corrected and parameters tweaked, I have a mesh of the surface.
This mesh can be opened in Blender. I selected the outer vertices, moved them down and connected them, resulting in this:
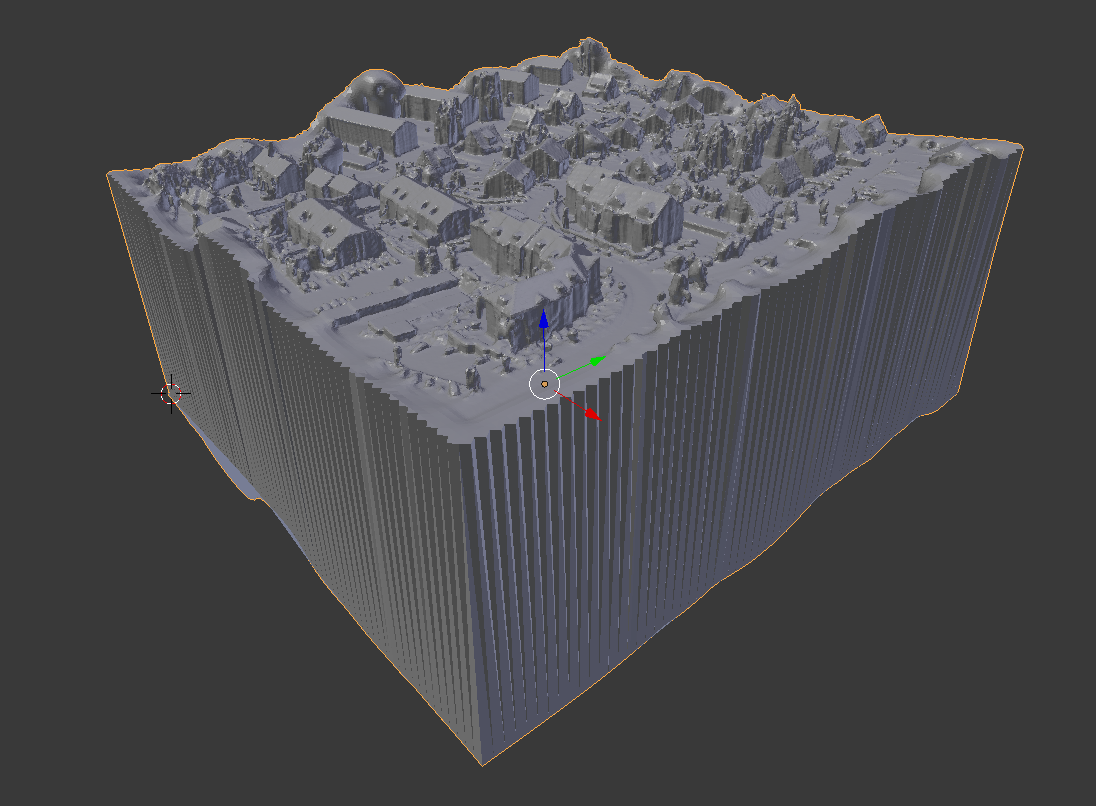
This is finally a solid body, although an ugly one. I created a 200m cube and applied a Boolean / Intersect operation between the two, resulting in the final model for printing. Here it is being prepared in Cura:

I printed it 12cm long with the smallest layer size available, 0.06mm, which took 21 hours.